How To Operate
Barcode
For example, you can set individual barcodes for cargo, pallets, parts, products, etc.
Basic Settings
(1) Enter the Barcode name and Code* of the barcode type (trace target).
(2) Select the Icon and Background color. (optional)
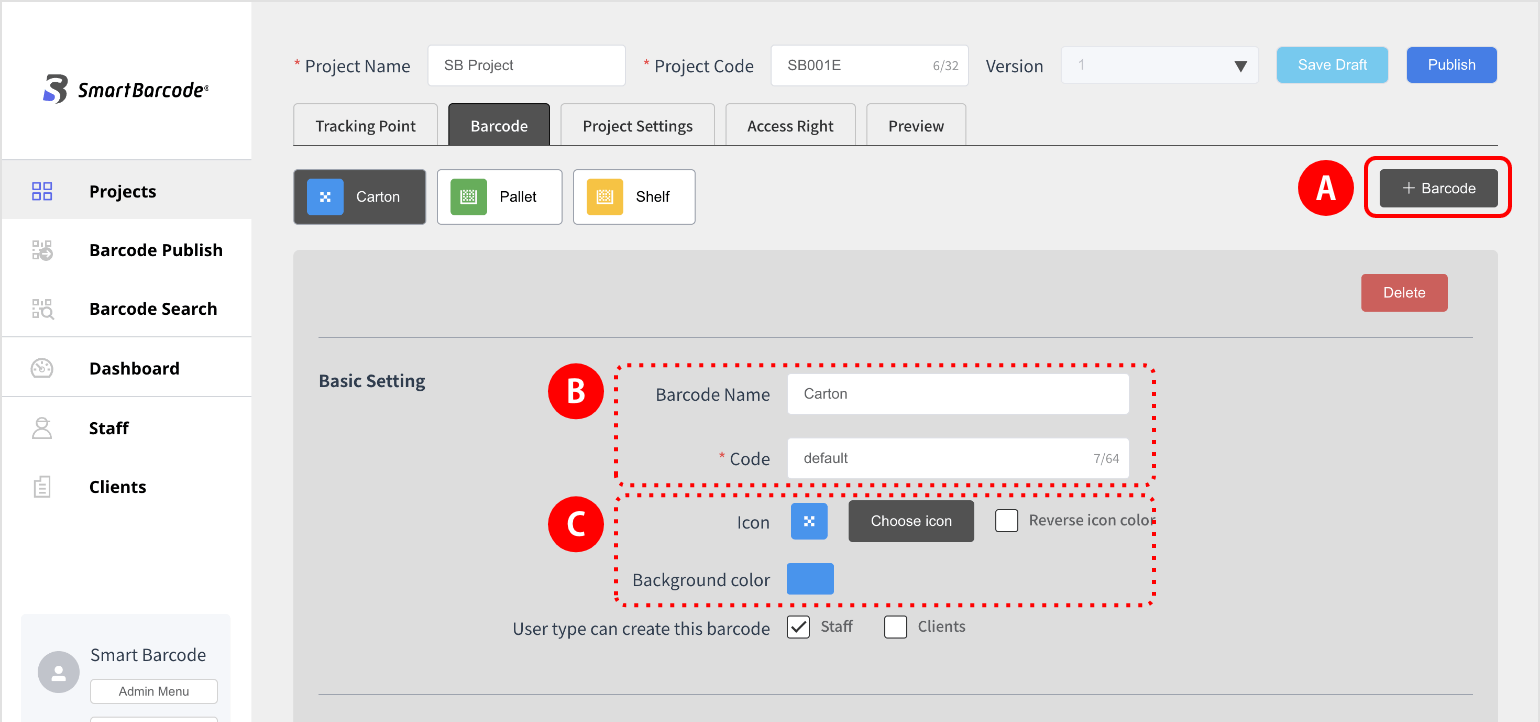
– Example: The barcode type (tracing target) is [ carton ] [ pallet ] and [ shelf ].
* ・Please set “Code*1″ and “Barcode name” arbitrarily.
・The Code is alphanumeric only, and spaces cannot be entered.
・The same code cannot be used in one project. (the same name can be used.)
・Except when creating a new code, the code is automatically generated, but you can change it to any code.
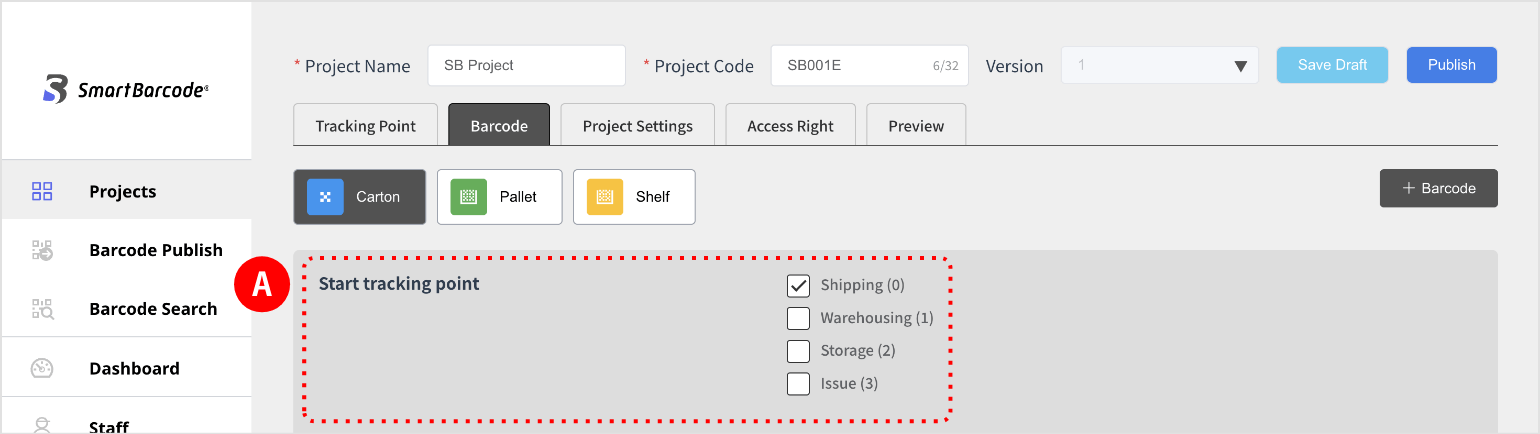
Start Tracking Point
*You can also set multiple starting tracking points.
・When issuing a barcode based on a CSV file, specify the starting tracking point as a number.
Activation Time Settings
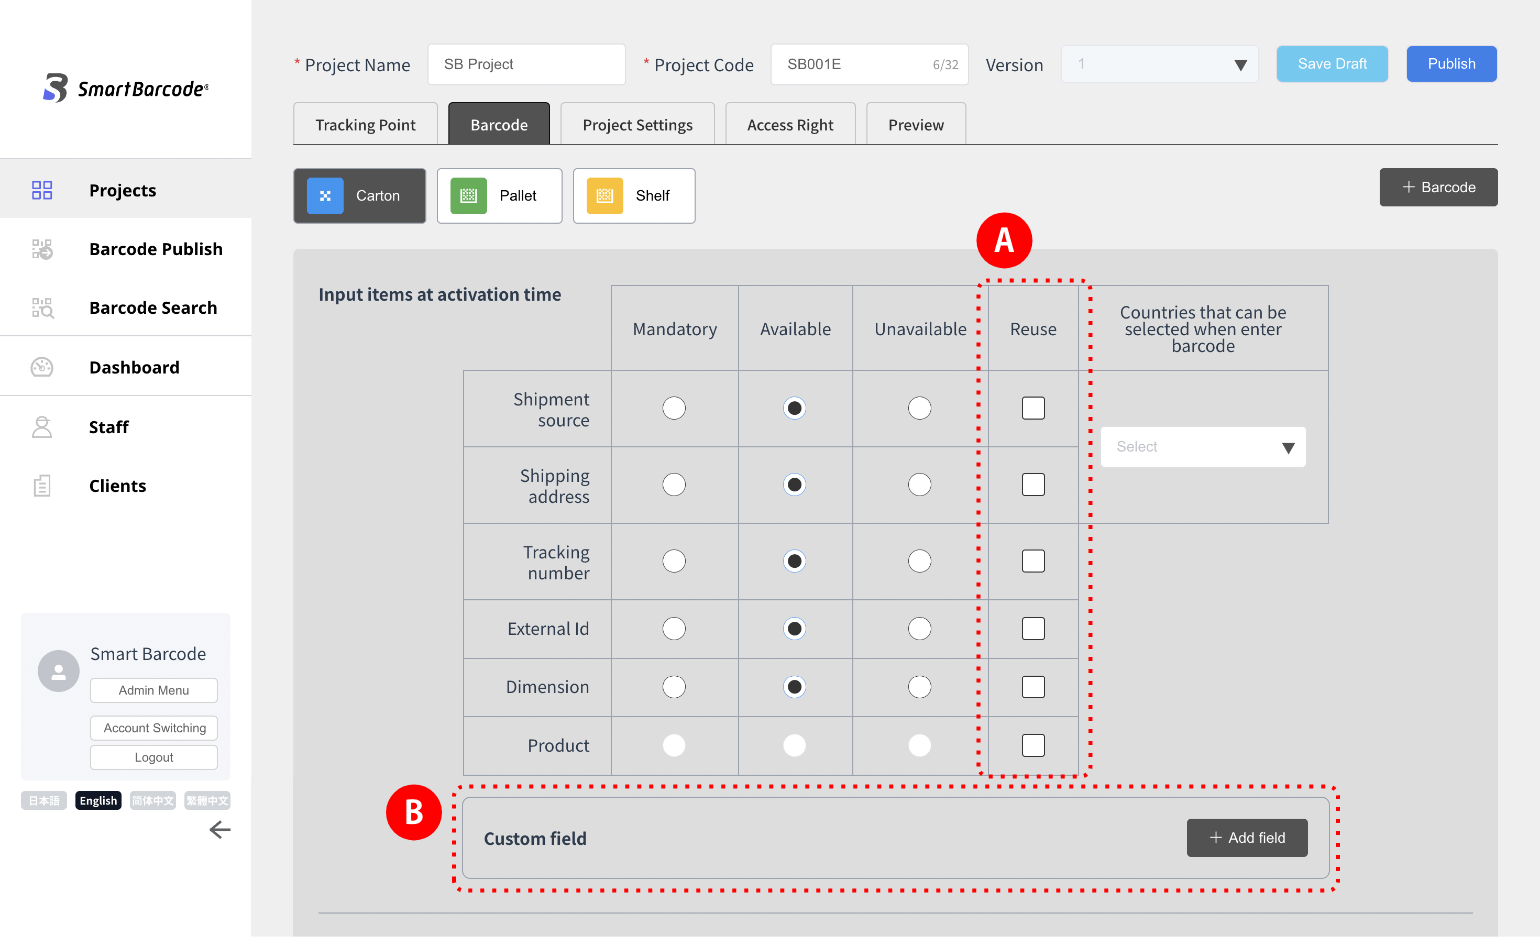
(1) “Reuse”
if you check the box, the input information will be retained when the barcode is reused.
(2) “Custom field”
is the same as the setting method for tracking points.
*Custom field to be recorded by the tracking point.
Tracking Number
“Tracking number” can also be used when searching for barcodes.
The “tracking number” can be set by any rule.
“Default value”
is the identifier that appears before the tracking number. (fixed alphanumeric)
If you check “Is Unique”,
you will not be able to generate barcodes* with the same tracking number.
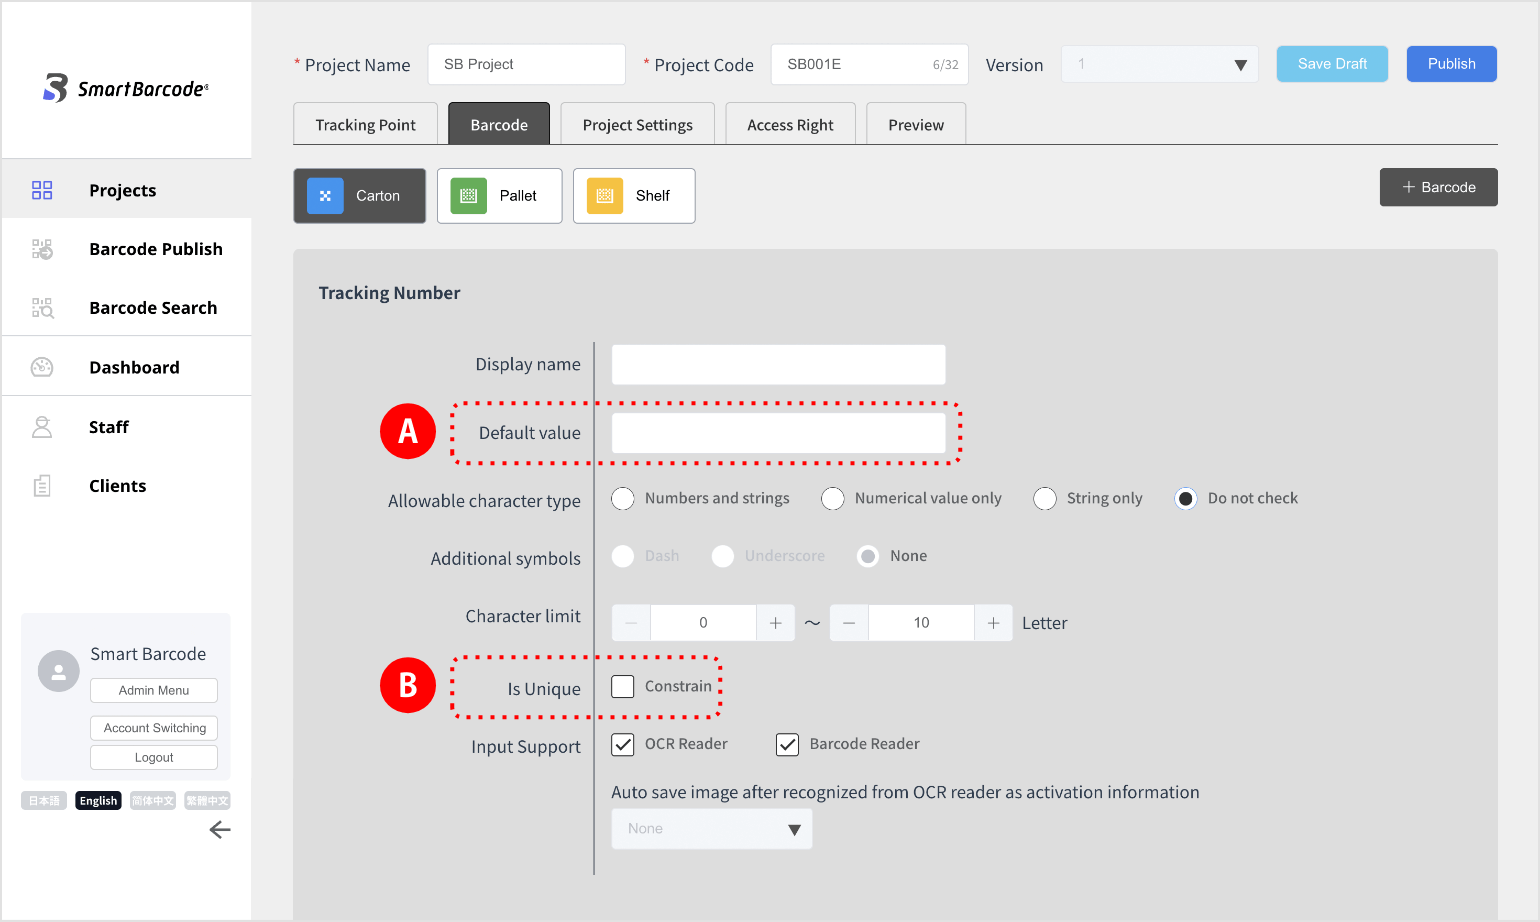
*Unique IDs is automatically set for each barcode, so there is no problem even if there are duplicate tracking numbers.
“Barcode ID” ≠ “Tracking number”
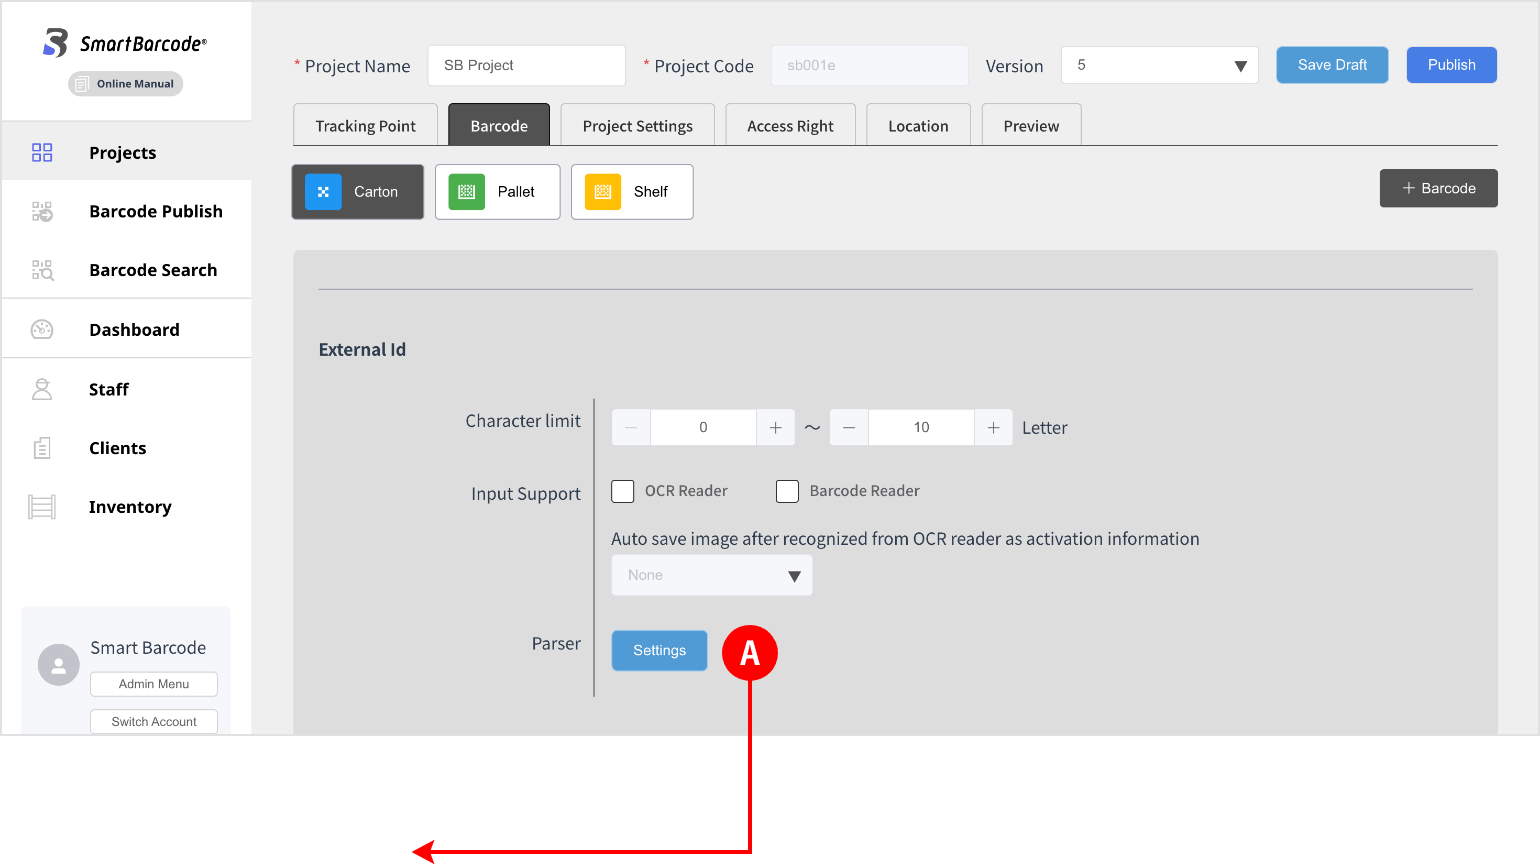
External ID
External ID Extraction
There are three extraction methods:
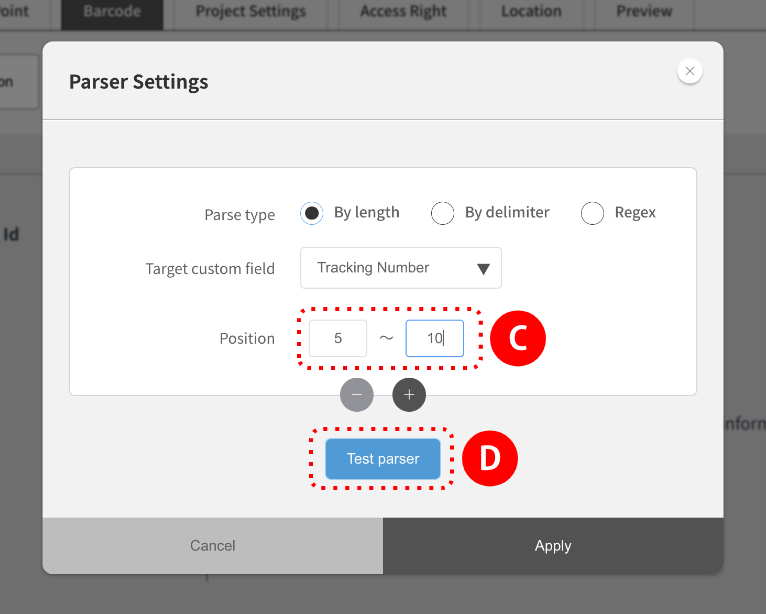
・Character String: Extracts a portion based on specified starting and ending characters.
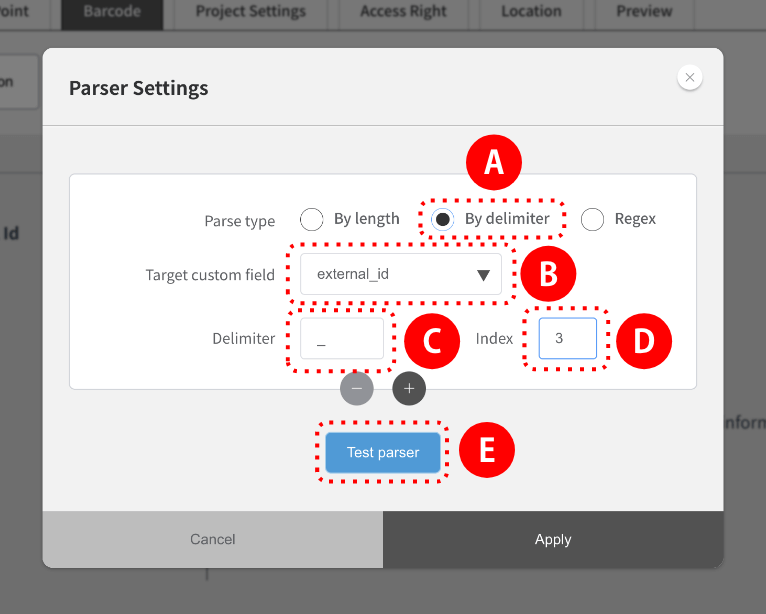
・Delimiter: For IDs separated by characters like “,” or “|”, you can specify which part to extract based on the delimiter type and position.
・Conditional Statement: Extracts based on regular expression conditions.
(1) Select “Character String”
as the extraction method.(2) Choose the target custom field.
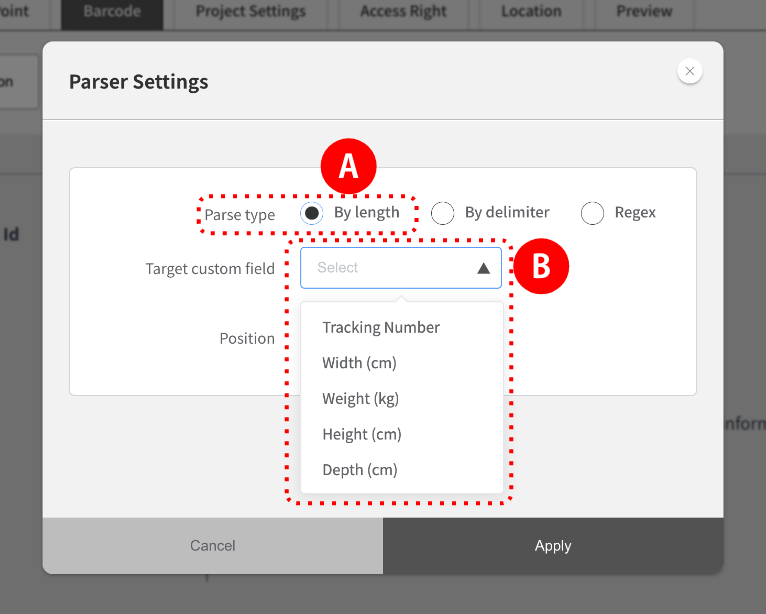
and click the confirmation button.
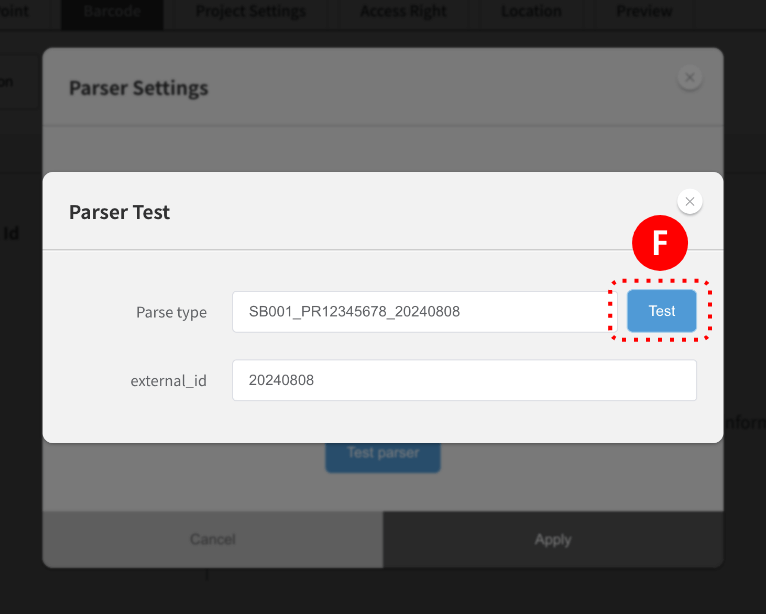
button on the confirmation modal to verify correct extraction.
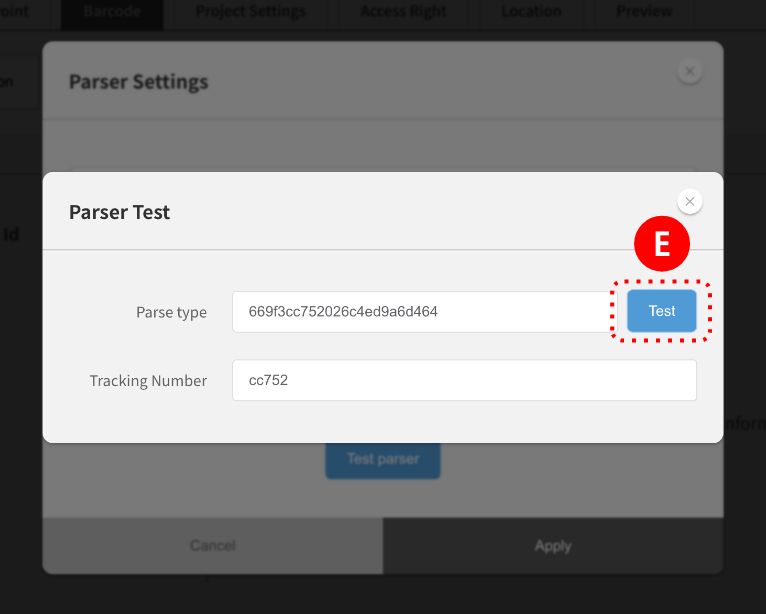
(1) Select “Delimiter”
as the extraction method.(2) Choose the target custom field.

(3) Enter the delimiter
and the part you want to extract
, then click the confirmation button.
button on the confirmation modal to verify correct extraction.
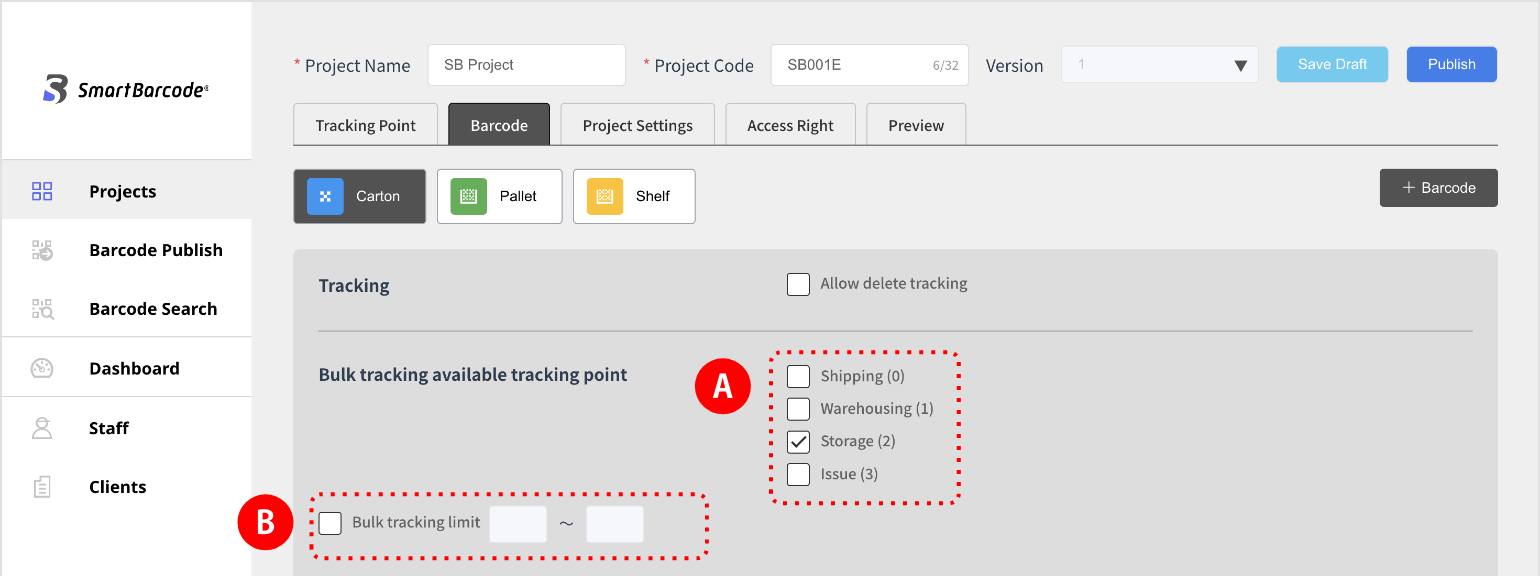
Bulk Tracking Available Tracking Point
(1) Select the tracking points that you want to allow bulk tracking.
(2) You can also set a limit on the number of bulk tracking.
*When there is a limit on the quantity of one package, etc.
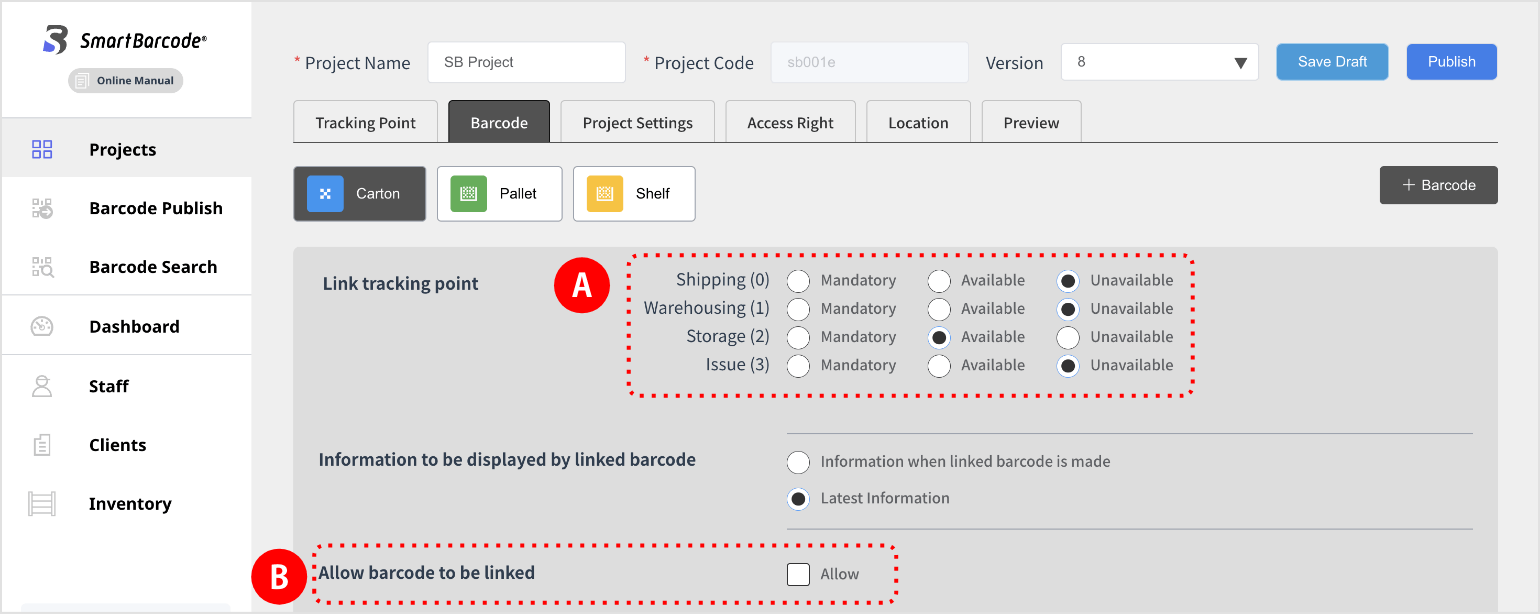
Link Tracking Point Settings
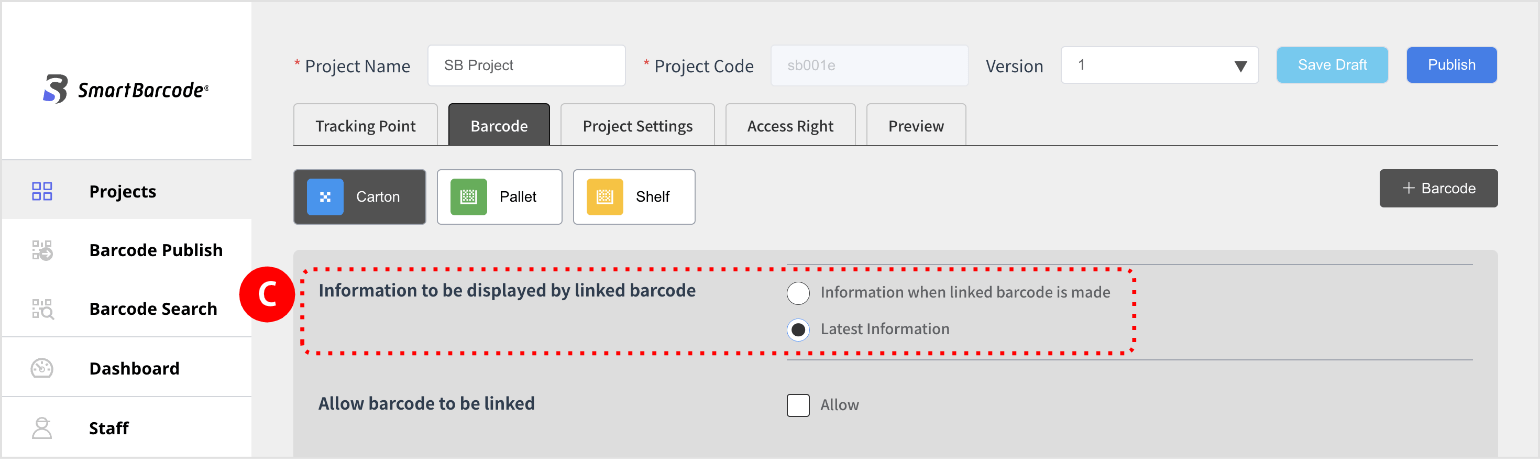
you can configure barcode links.
* Barcode linking is to link another barcode to the main barcode.
You can check the information of another barcode from the primary barcode.
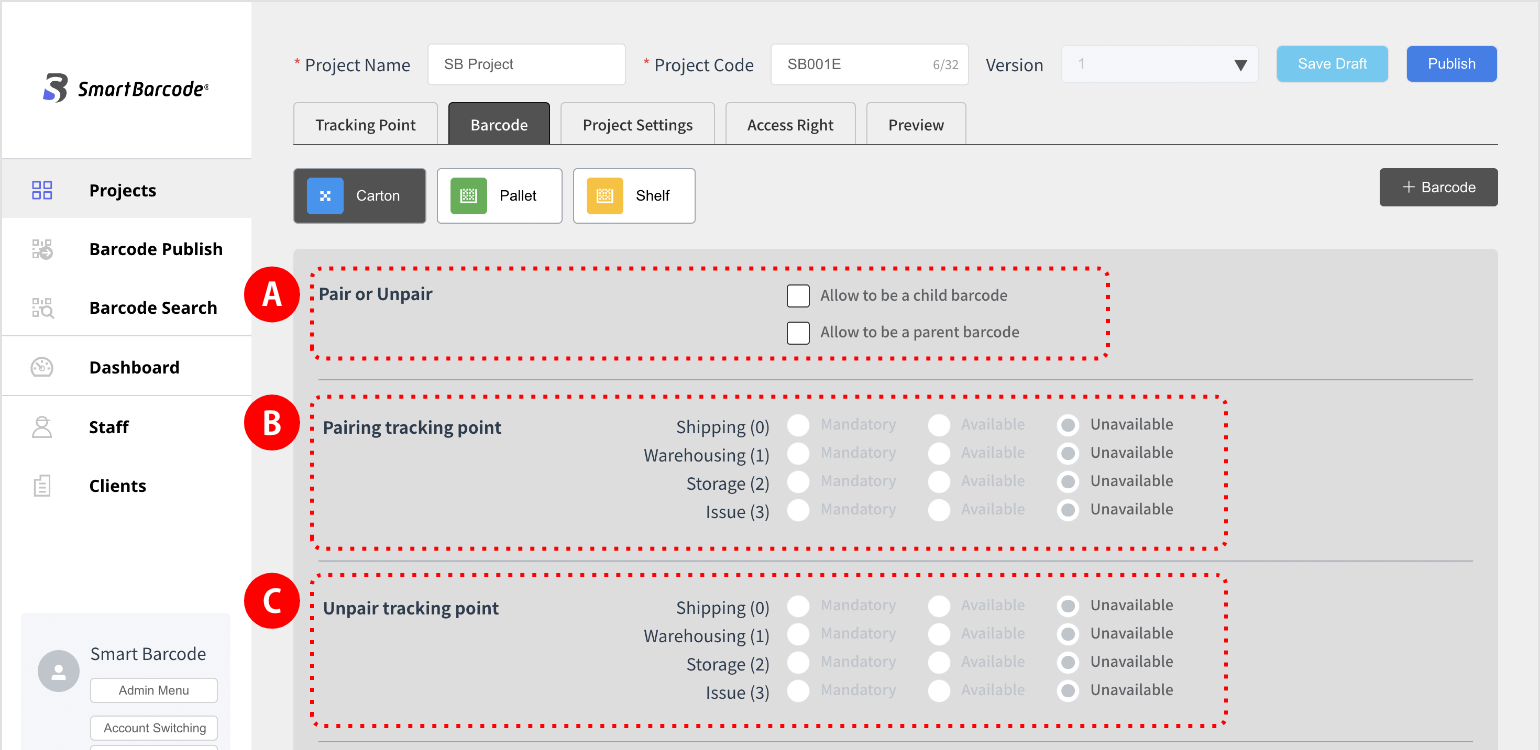
Pairing Settings
“Pairing” is the establishment of a parent-child relationship between individual barcodes.
Set the parent barcode to be paired with the child barcode.
(pallets and cargo, containers and pallets, etc.)
Scanning the parent barcode automatically updates the information in the child barcode.
If you uncheck it, it will be canceled.
* You can set the barcode to “Only if it is the parent barcode”.
* Cancel pairing is set when you want to cancel the parent-child relationship and continue tracing (including re-pairing) the child barcode.
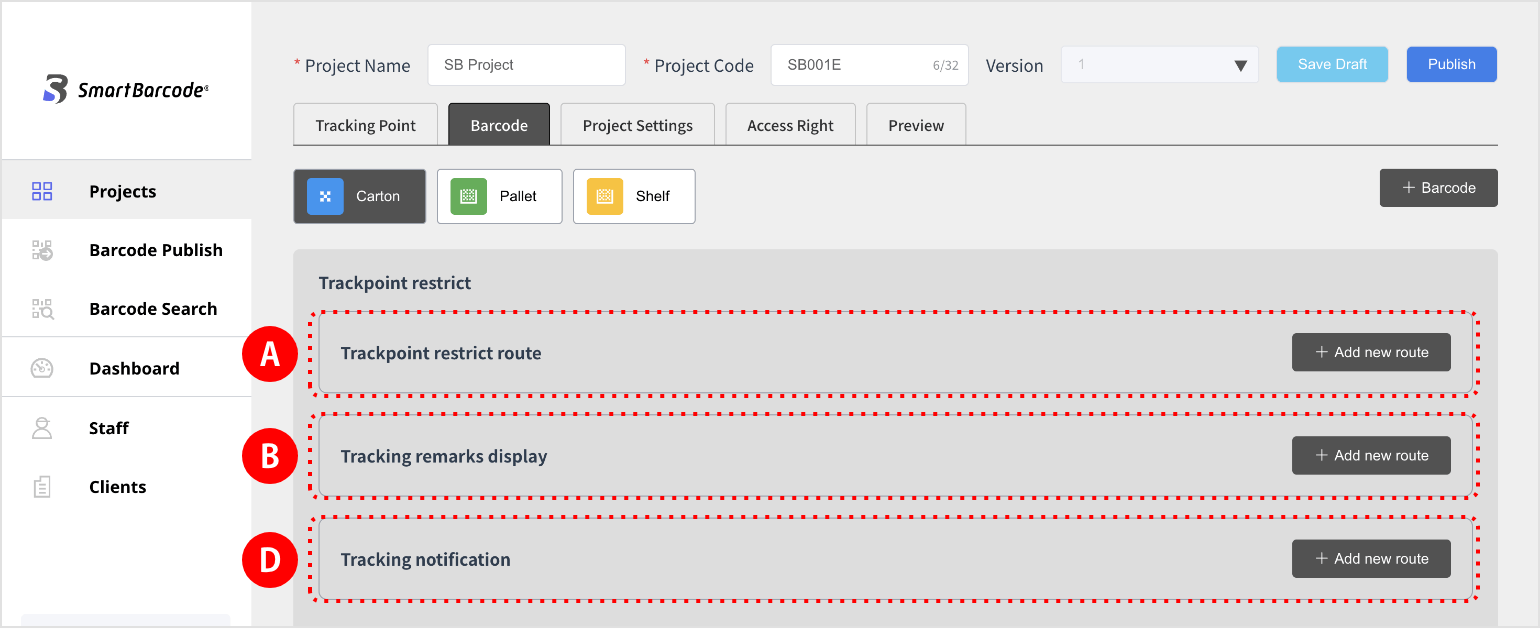
Configuring Additional Tracking Features
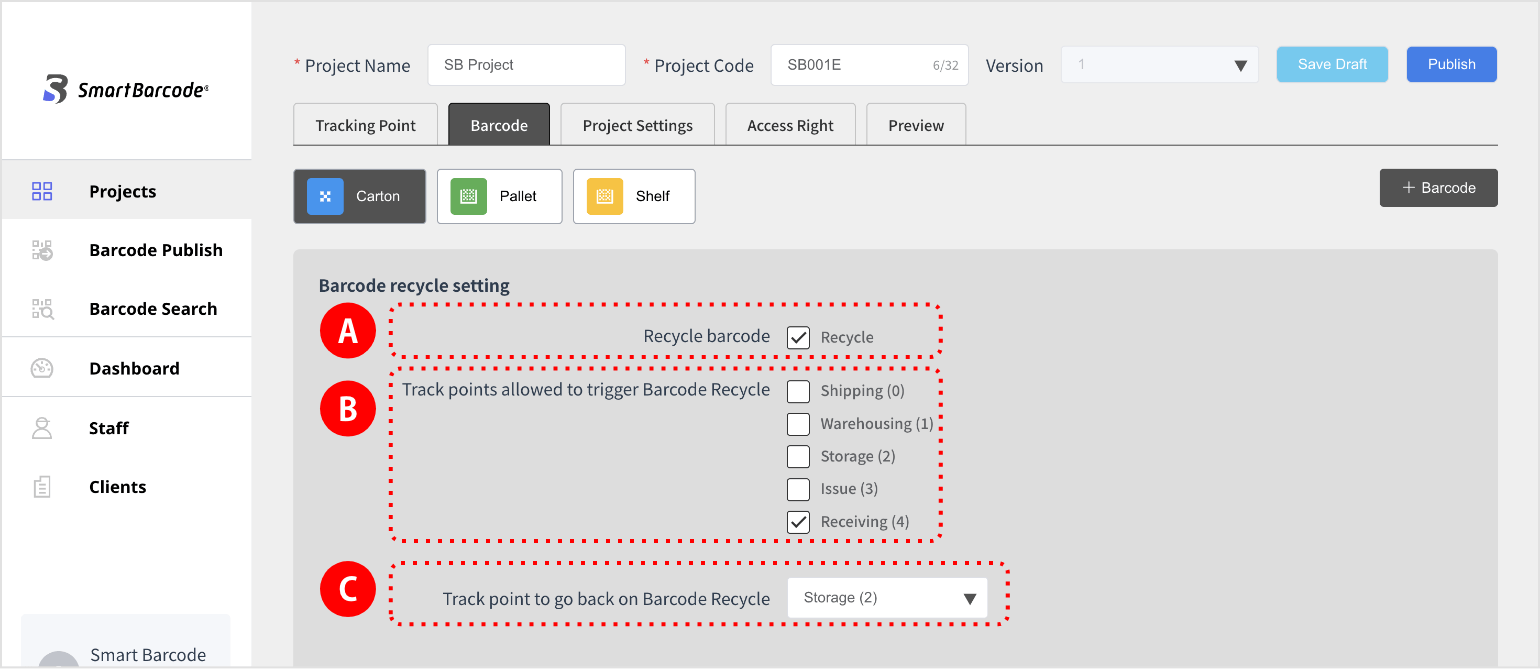
Barcode recycle setting
(It can be used in returnable boxes and containers.)
Even after reuse, you can check the history of past traces.
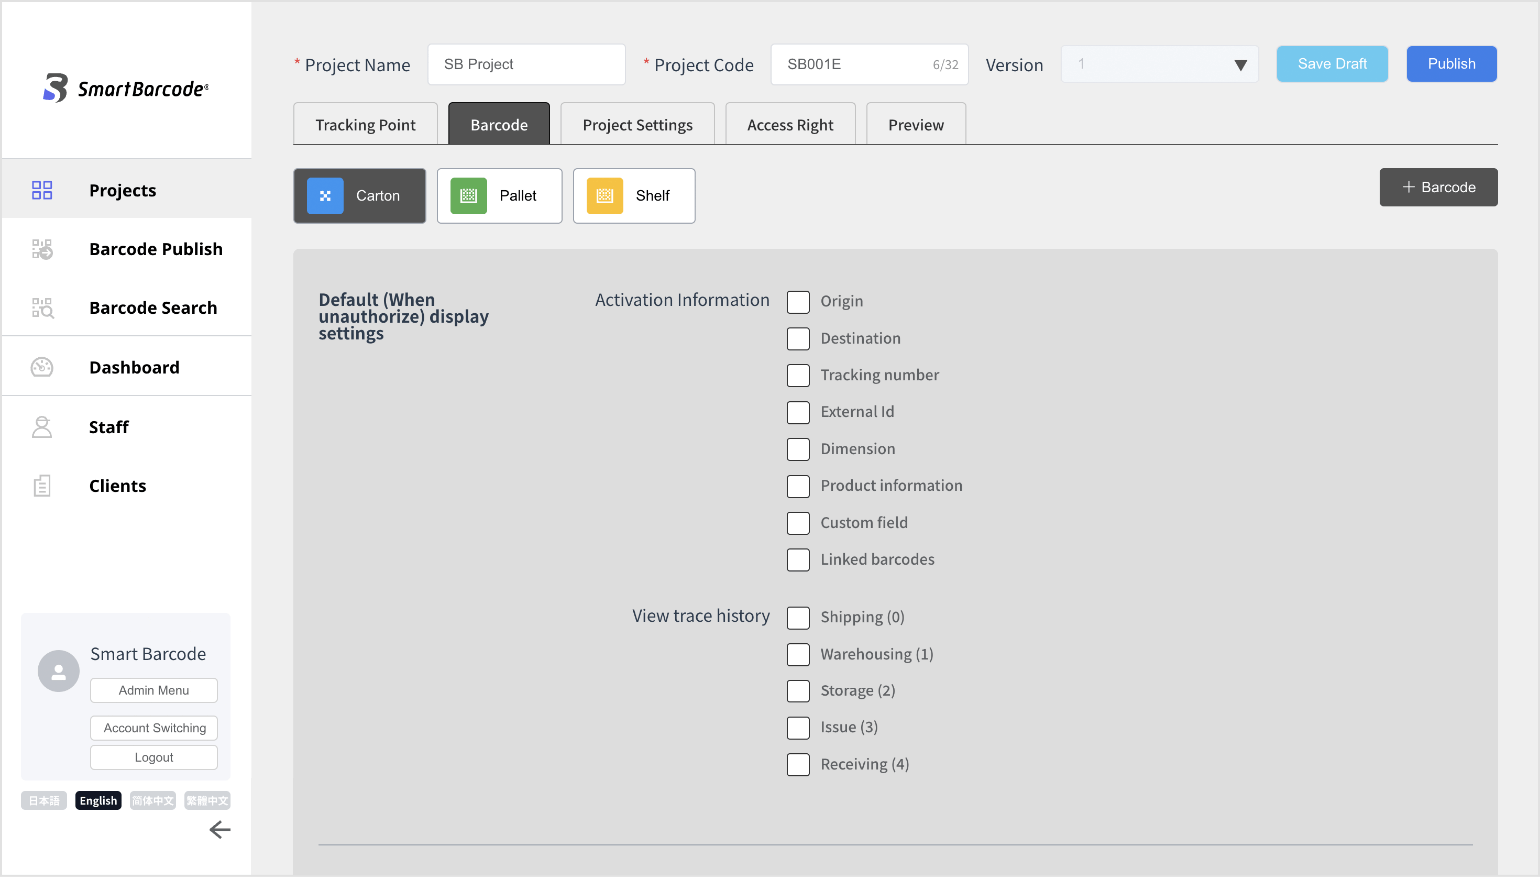
Setting Up Default Display Settings
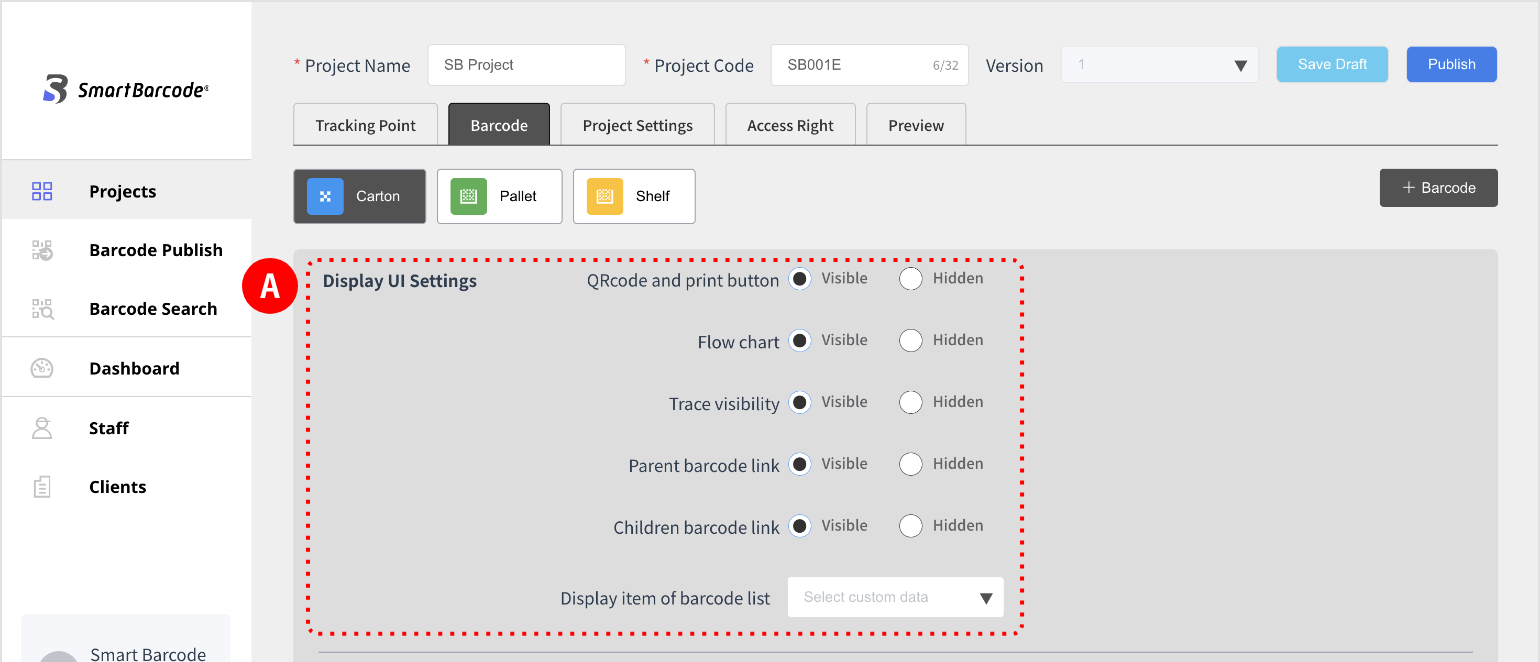
Display UI Settings
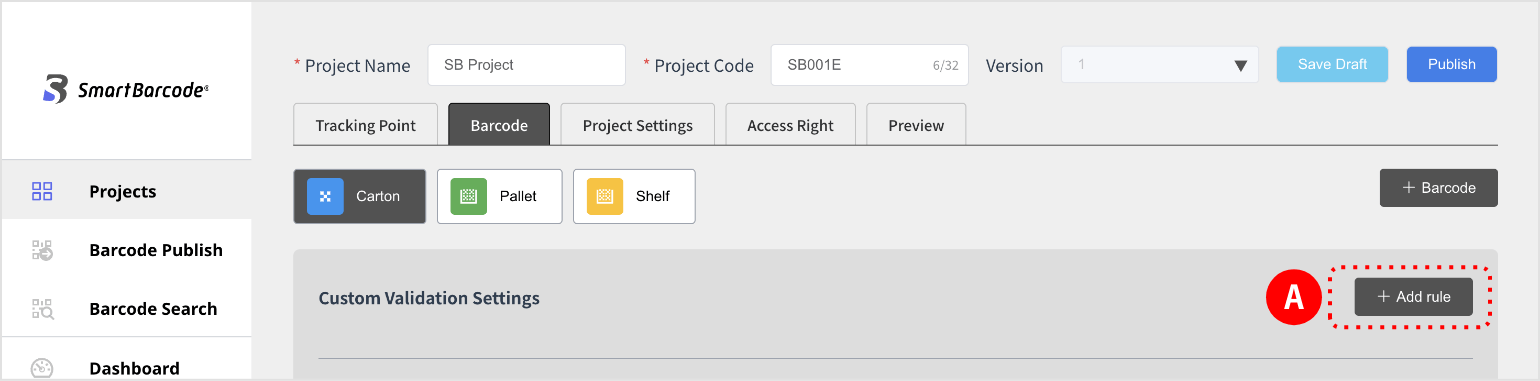
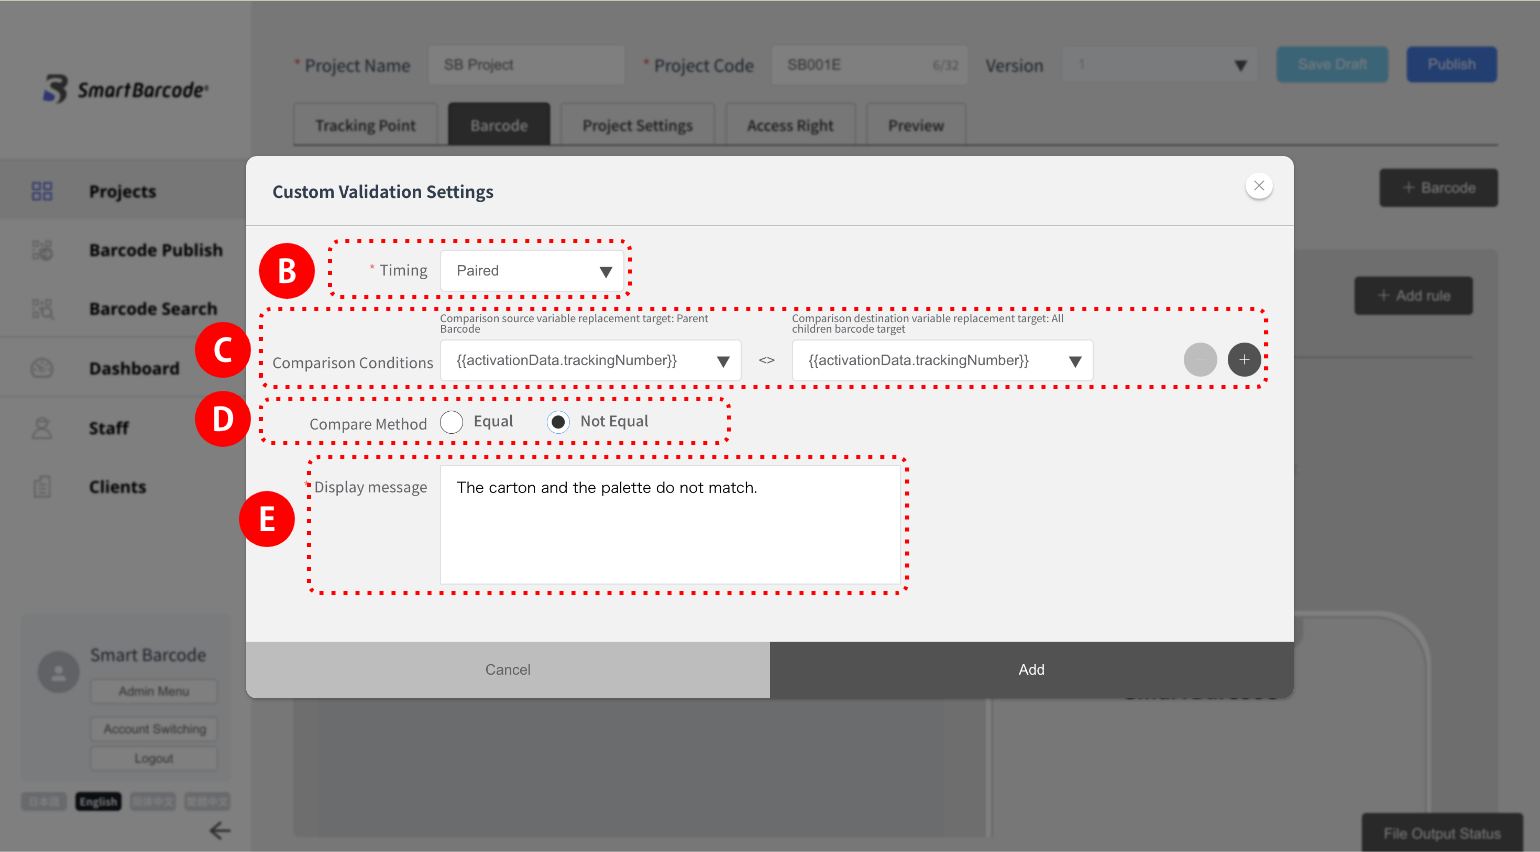
Custom Validation Settings
You can set the validation when you link barcodes and pair.
Match recorded and trace information between each barcode, and if inappropriate, display an error message and limit tracking.
It is effective in preventing erroneous shipment and misloading.
(2) Select the timing (tracking, pairing, barcode linking).
(3) When tracing, select a route and set the comparison conditions (match data).
Multiple conditions can be set in “⊕”.
(4) Select a compare method.
(5) Enter a message to display when an error occurs.
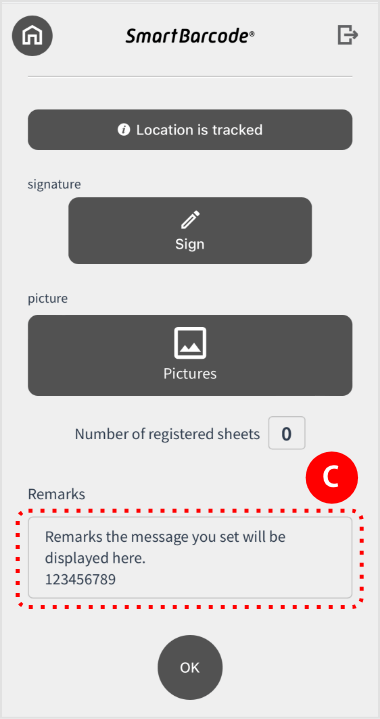
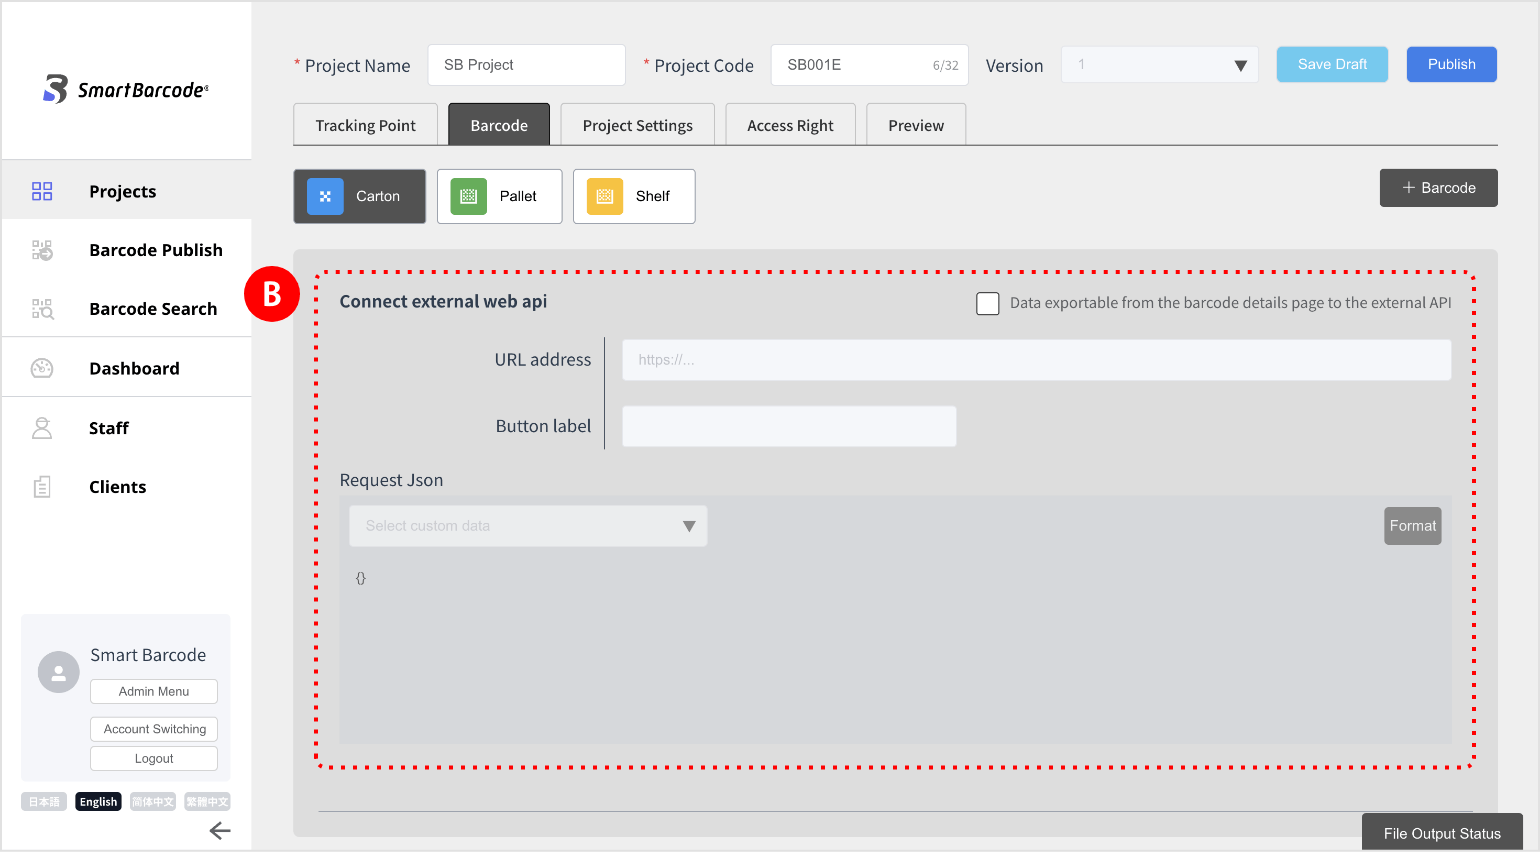
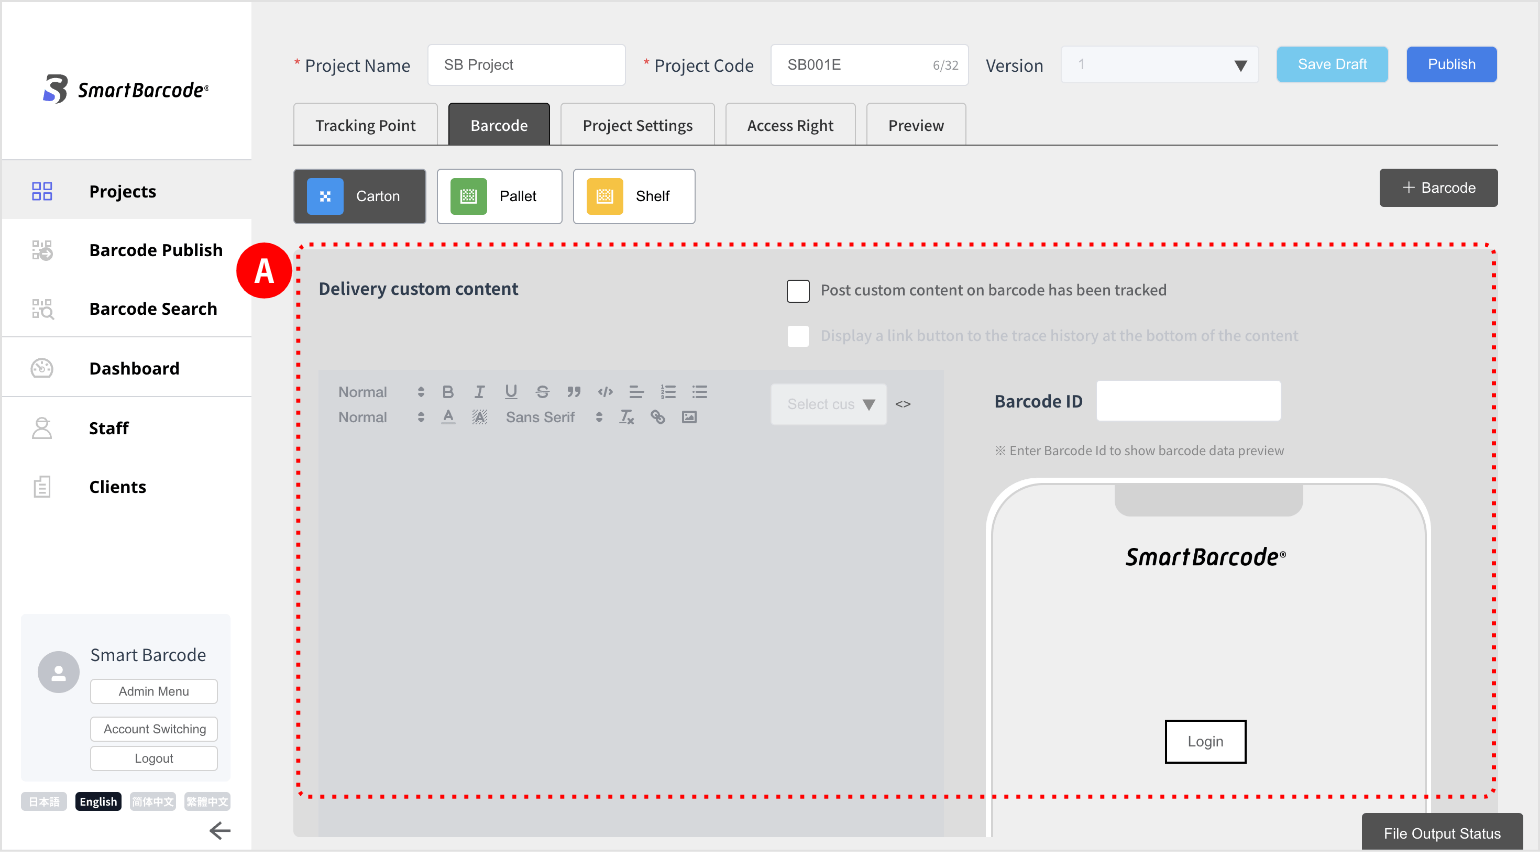
Set Up Delivery Custom Content
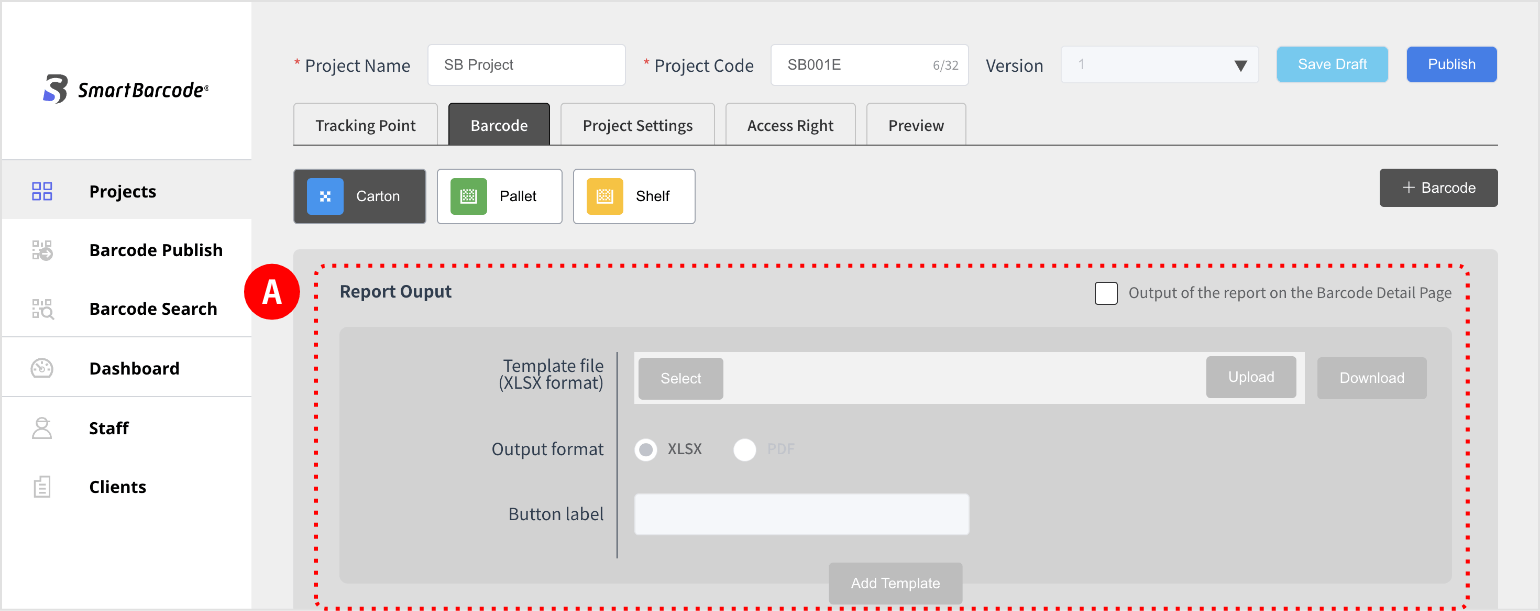
Report Output
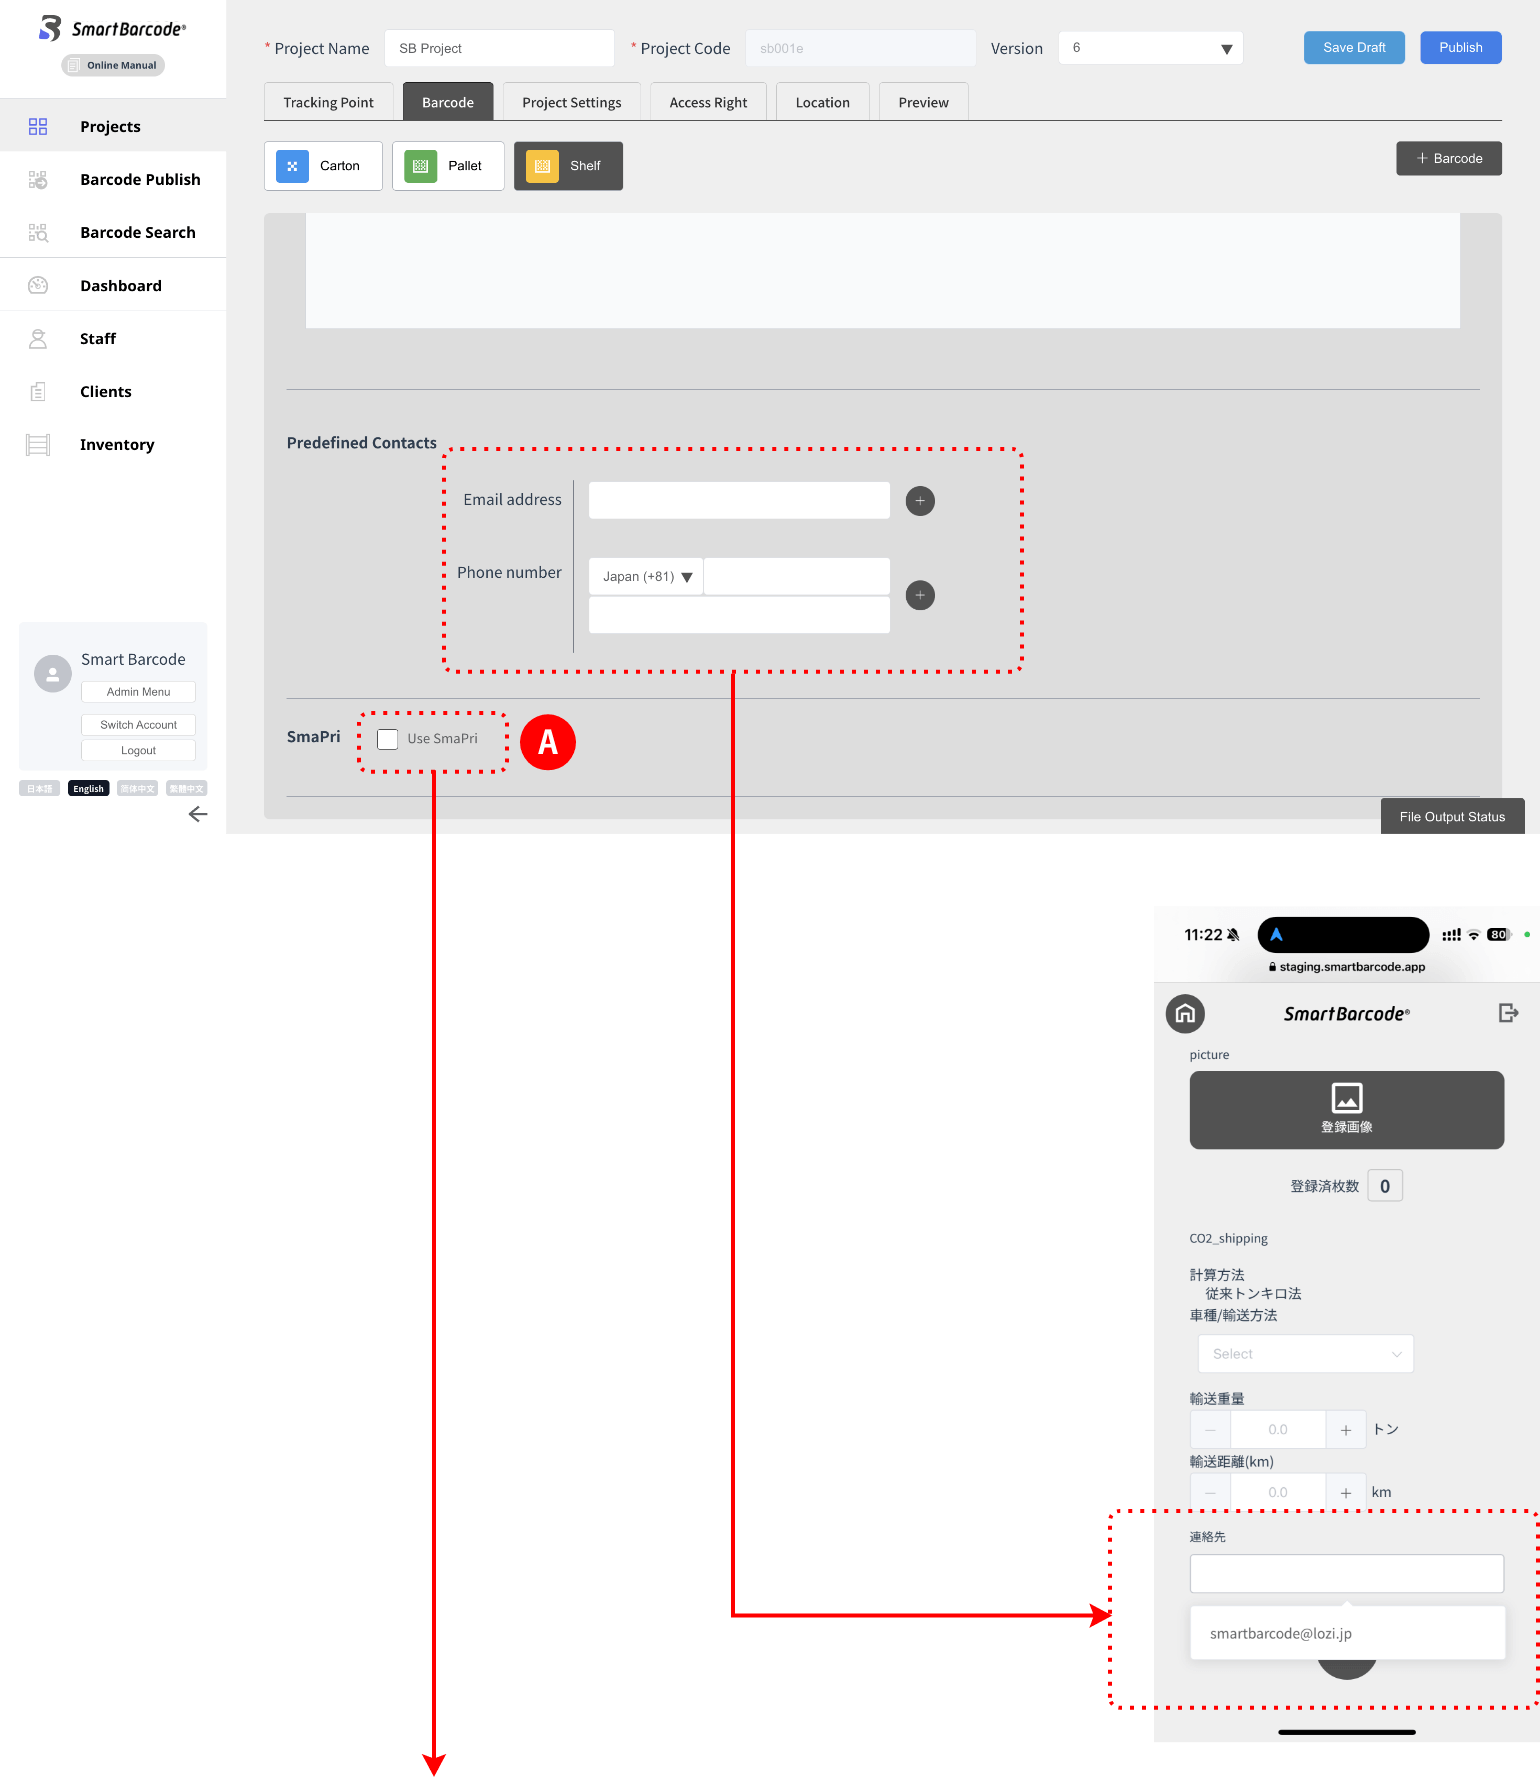
Contact Registration
SmaPri
you can print barcodes directly from a compatible Sato printer.